C64 Reloaded MK2
At last the keyboards I ordered for the new C64 Reloaded MK II arrived. This meant I had everything and it was time to do the first build. I still have some better chips coming for it that will go in when they finally get here.

To build the Reloaded C64 computer with this board all you need to supply are the chips below on your own;
- CPU 6510 or 8500
- two pcs. CIA 6526 or 8521
- video chip 6567, 6569, 8565 or 8562
- one or two sound chips 6581 and/or 8580

From these for this first build I used the 8500 CPU, two of the 6526 R1 Chips, an 8565 Pal VIC II Chip and 2 8580 SID Chips. I also used a protection circuit adapter for the CIA Chips. I have to say the MKII Board is very well made, rather impressive actually. Thijs of course is the 65C to last me forever with a spare machine incase I ever need to harvest parts.

Eventually I will have two 6526R4 chips and a pair of special SID FPGA chips. I stole the power LED from my spare 64C. Yes, the CIA Protection Circuit is likely overkill, but hey, just having a little fun and did because I could!

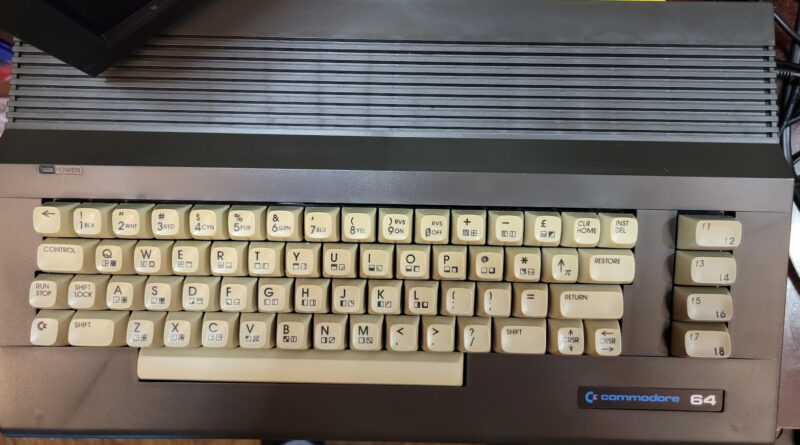
For this build I used a 64C case from Germany, black SX64 style Log. I have both brown and white keyboards, I used the white/tan set for the first build. You can see in the pictures below that the case disappointingly had defects. This is a real shame and I was told they are all like that, IE, nothing to do. My clear case doesn’t have these defects so long term I will have to decide what I wish to do. Perhaps I will take the old spare 64C Case and refinish it black myself and use it, or I can always move this board to the crystal case as well. I will just let it settle in for a bit as is and go from there. I did find the screws to be a little tight and maybe a little too long. Had I known I would have likely gotten slightly smaller screws to replace the ones they sent.

I followed this video on Youtube to just guide me through the build. Its ridiculously simple to be honest. The left keyboard bracket is the only gotcha in the whole build process. Be sure to buy your Keyboard brackets, they don’t come with the case or kit! The key secret here is to ensure you get the left bracket under the motherboard with the rubber grommet. Then you can screw down your board.
The new Reloaded 64C fired right up, zero issues. Works great with the Chameleon Cartridge as well.
I did not install JiffyDos on the reloaded yet. I did acquire a license for it to keep it all legal.
An pair of stereo ARM SID chips will eventually arrive and replace the 2 8520’s I am using now. Should be interesting to compare.

An pair of stereo ARM SID chips will eventually arrive and replace the 2 8520’s I am using now. Should be interesting to compare. This set is actually for an MKII Reloaded Board.
Once you get it assembled (all of 10 minutes if even that) you will want to get into the utility to check out the configuration. YUou just need a simple terminal program and a cable to connect your PC to your new MKII. Its one of the standard but older type USB cables. The Terminal program in the MKII WIKI works fine. Once your connected 19200 8N1 you can hit enter and get the menu. Its very straight forward and allows you to configure your SIDs and Modes, Upload 8K Kernel ROMs using Xterm mode and configure keys if you like.

As shown above I loaded in the JiffyDos image I purchased and wrote it to Slot 1. You can then choose what Kernel to use and write the settings to the MKII. JiffyDos popped right up as shown below.

So while this post is laden with pictures, I do hope they help paint the picture of the MKII. Its a very very nice C64 and likely my last I will purchase! It should outlast me now! Now its time to hook up some Joysticks and have a little fun!
Till next time!
EverStaR