Amiga a314 Status
I have been seriously heads down working through several issues I have had with my a314 build process and boards. I will provide some summarized updates here just to keep you updated.
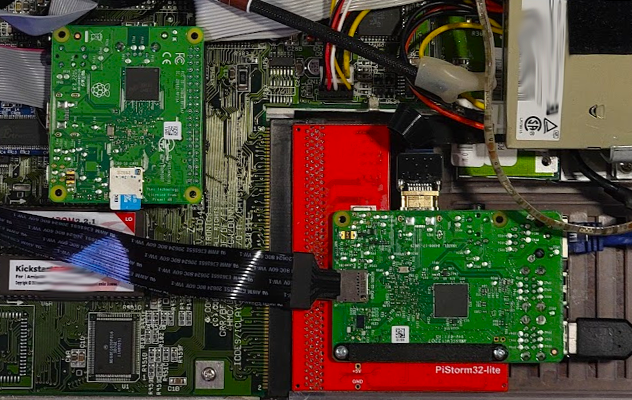
This is a quick summary of how to use AmigaPi to setup your A314 CPL Boards. If you don’t have a board, contact Sedrickgates on the Discord Channel. He sells the Niklas boards and I like that board and the nice support bracket he includes.
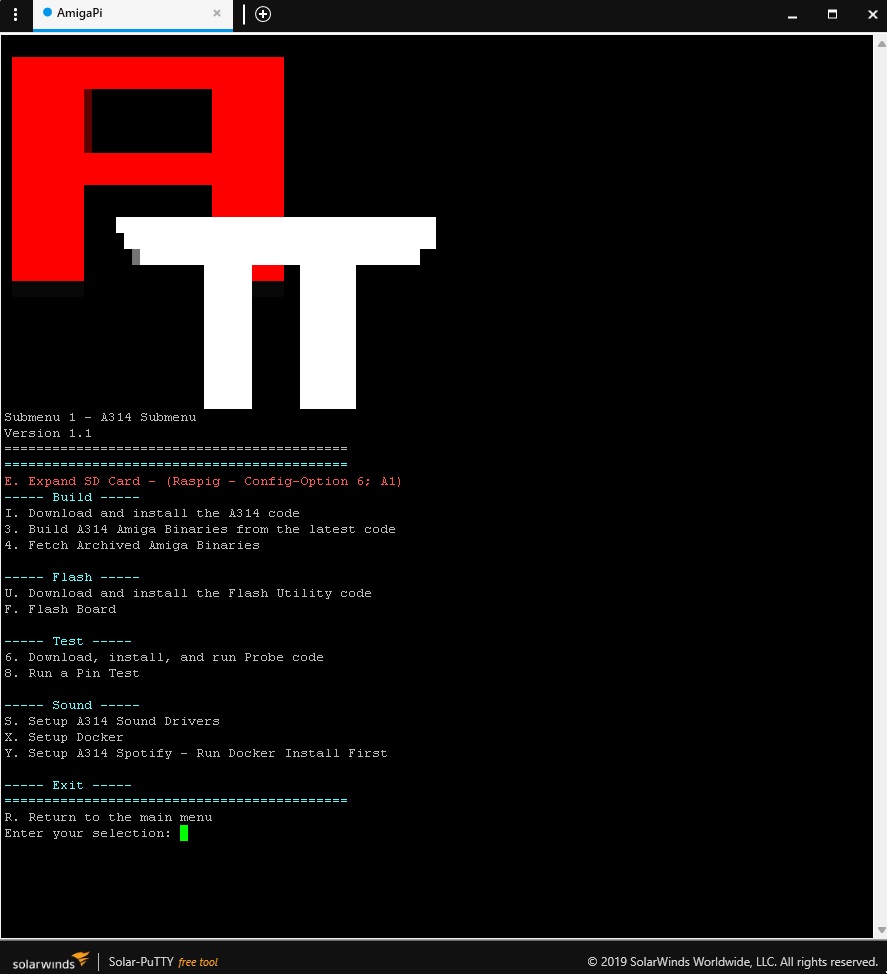
From the Main Menu select Option 1 for the A314 Install.
You will notice a MIXTURE of lettered menu options and numbered options. The lettered options are the key parts of the install. If you want to test your board you can use some of the numbered options.
Start by making sure your SD Card has expanded; I have noticed that sometimes it is not automatically doing it like advertised. This will cause you issues later in the install process if you fail to expand the card. Option E will load raspi-config and from there you can choose Option 6 and then Option A1. Exit the program and answer the Yes to reboot when prompted.
Next you will come back to AmigaPi after the reboot and choose I. This will do several things, update your Pi, install all the A314 supporting packages and create and edit the required config and setup files. After completing I you will be able to install the Amiga Binaries on your Amiga and test out the PIO: Drive and setup networking. Instructions to setup Roadshow are provided below.
ON Your Amiga
The binaries for the Amiga side are already built and are available as part of a release on the GitHub page: https://github.com/niklasekstrom/clockport_pi_interface/releases
There are multiple sub directories in the release archive, and the files in those sub directories should be copied to the corresponding sub directories in the AmigaOS system volume.
After these files are copied to the Amiga it should be possible to mount the PiDisk: by Mount PI0:. The pi command can be invoked by pi without any arguments to run bash, or with arguments to run a particular Linux command.
- Mount PI0:
Check to see if you can access the drive.
- PIO:
- Dir
If you are able to successfully see the PIO: directory you are well on your way and can continue the rest of the installs testing to make sure nothing breaks your installation..
Configuring Amiga Networking
These instructions show how to configure Roadshow and Miami for a314 ethernet, they do not describe how to install either.
- The network drivers are a part of the Amiga Binaries in the Amiga side below. Extract to a directory in RAM: and copy everything to your System:
Roadshow – tested and works
- Copy a314eth.device to SYS:DEVS:Networks
located in the Amiga Binaries DEV
- In the SYS:DEVS:NetInterfaces create txt file named A314Eth with the following lines in it and save.
device=a314eth.device
address=192.168.2.2
netmask=255.255.255.0
- Edit SYS:DEVS:Internet/routes and add add this line
default 192.168.2.1
- Edit SYS:DEVS:Internet/name_resolution and add add this line
Nameserver (IP Address of Default Gateway on your PI IP)
IE your Pi IP address is 10.1.1.45
Then use 10.1.1.1
So you would add the line;
nameserver 10.1.1.1
You should change the nameserver to a DNS server that works on your network. This can often be your router – for example 192.168.0.1 or 10.0.0.1. Google can sometimes be used as well. 8.8.8.8.
Note that there may be settings in the above two files (routes and name_resolution) that you wish to keep, so look through the changes you are about to make first.
Reboot the Amiga and with some luck you should be able to access the Internet from your Amiga.
You can open a shell and type ping google.com and if you are successful you will get successful pings.
- You may like to also install a terminal program on your Amiga to enable access your Pi directly from your Amiga.
Remember to save your settings! Click Online and hopefully your Amiga now has internet access.
Look for future updates as I explore my a314 more and add new avenues to play!
EverStaR